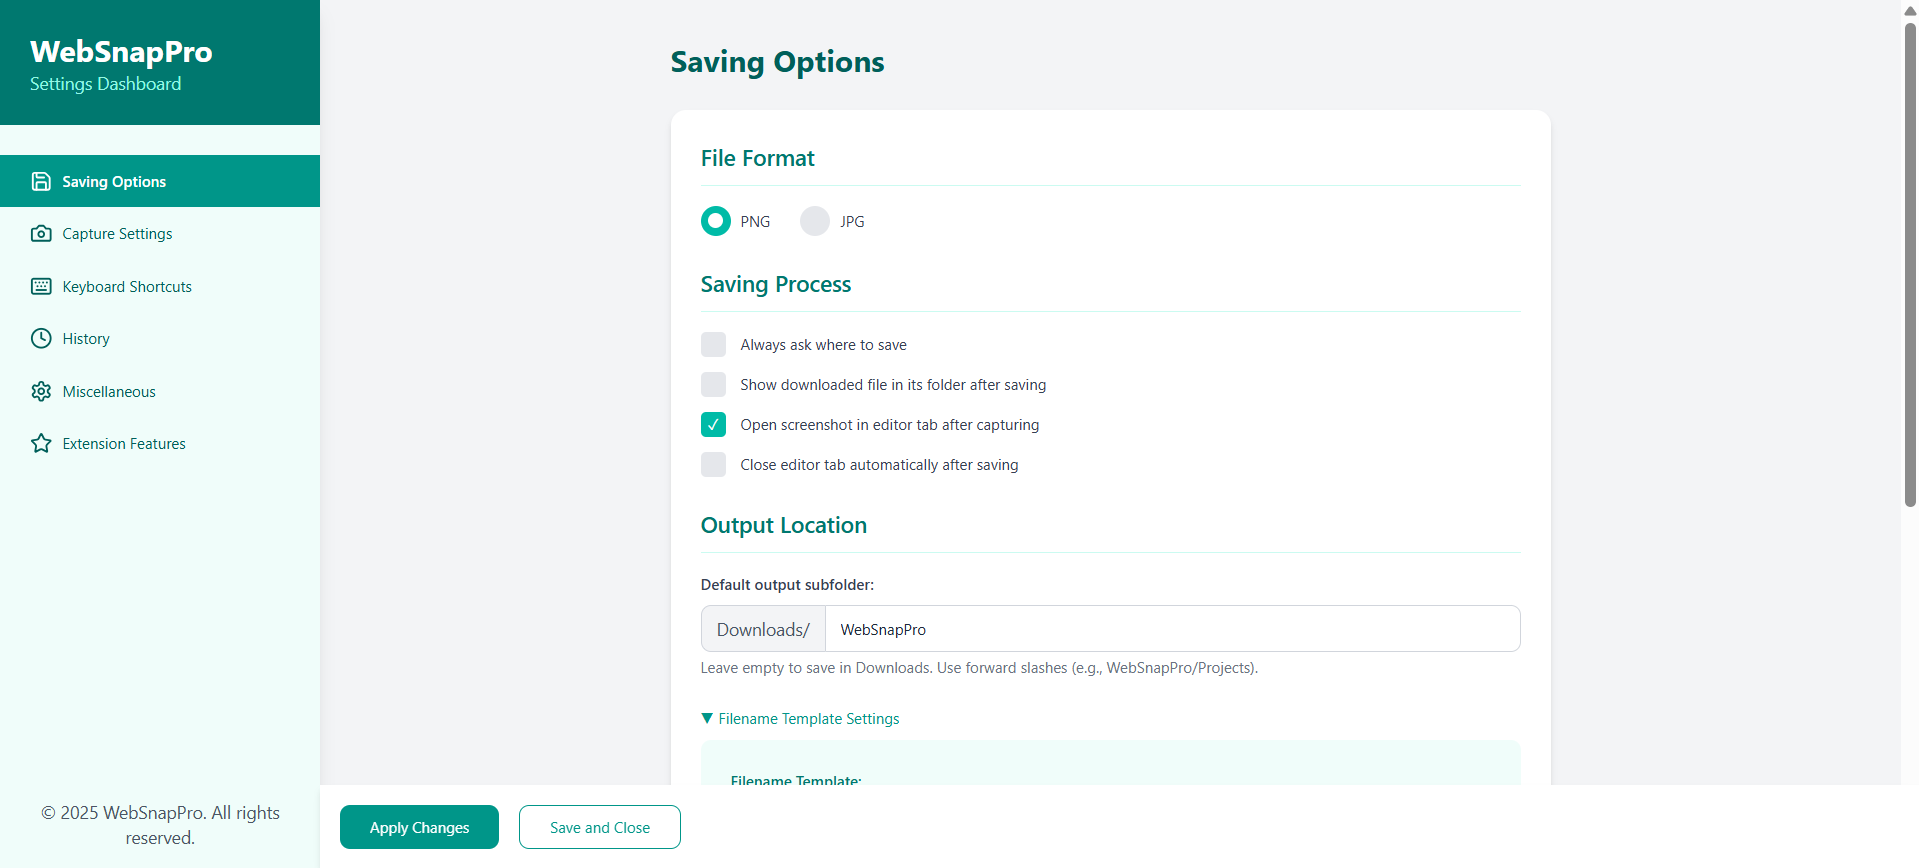
How WebSnapPro Works
Capturing and sharing web content has never been easier. Follow these simple steps to get started.
Step 1
Install the Extension
Add WebSnapPro to Chrome from the Web Store or load unpacked from the 'dist' folder. Once installed, you'll see the extension icon in your browser toolbar.
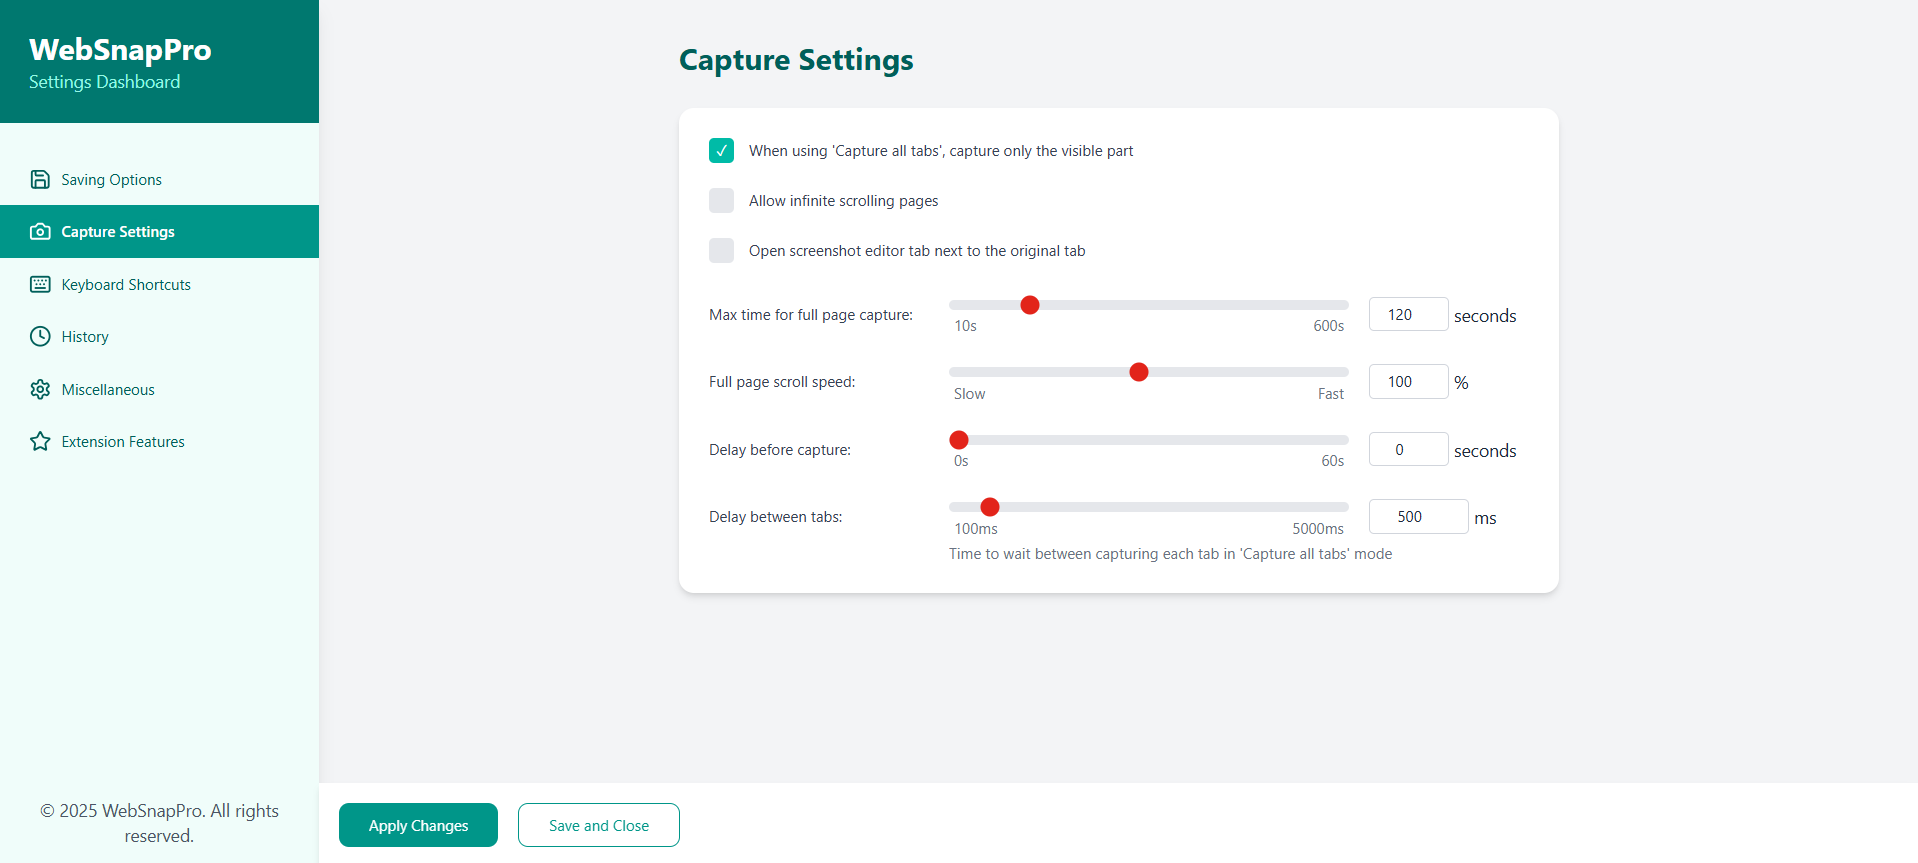
Step 2
Choose Your Capture Mode
Use Alt+F for Full Page with auto-scroll, Alt+V for Visible Area, or Alt+A for Area Selection with grid overlay. Access via popup menu or right-click context menu.
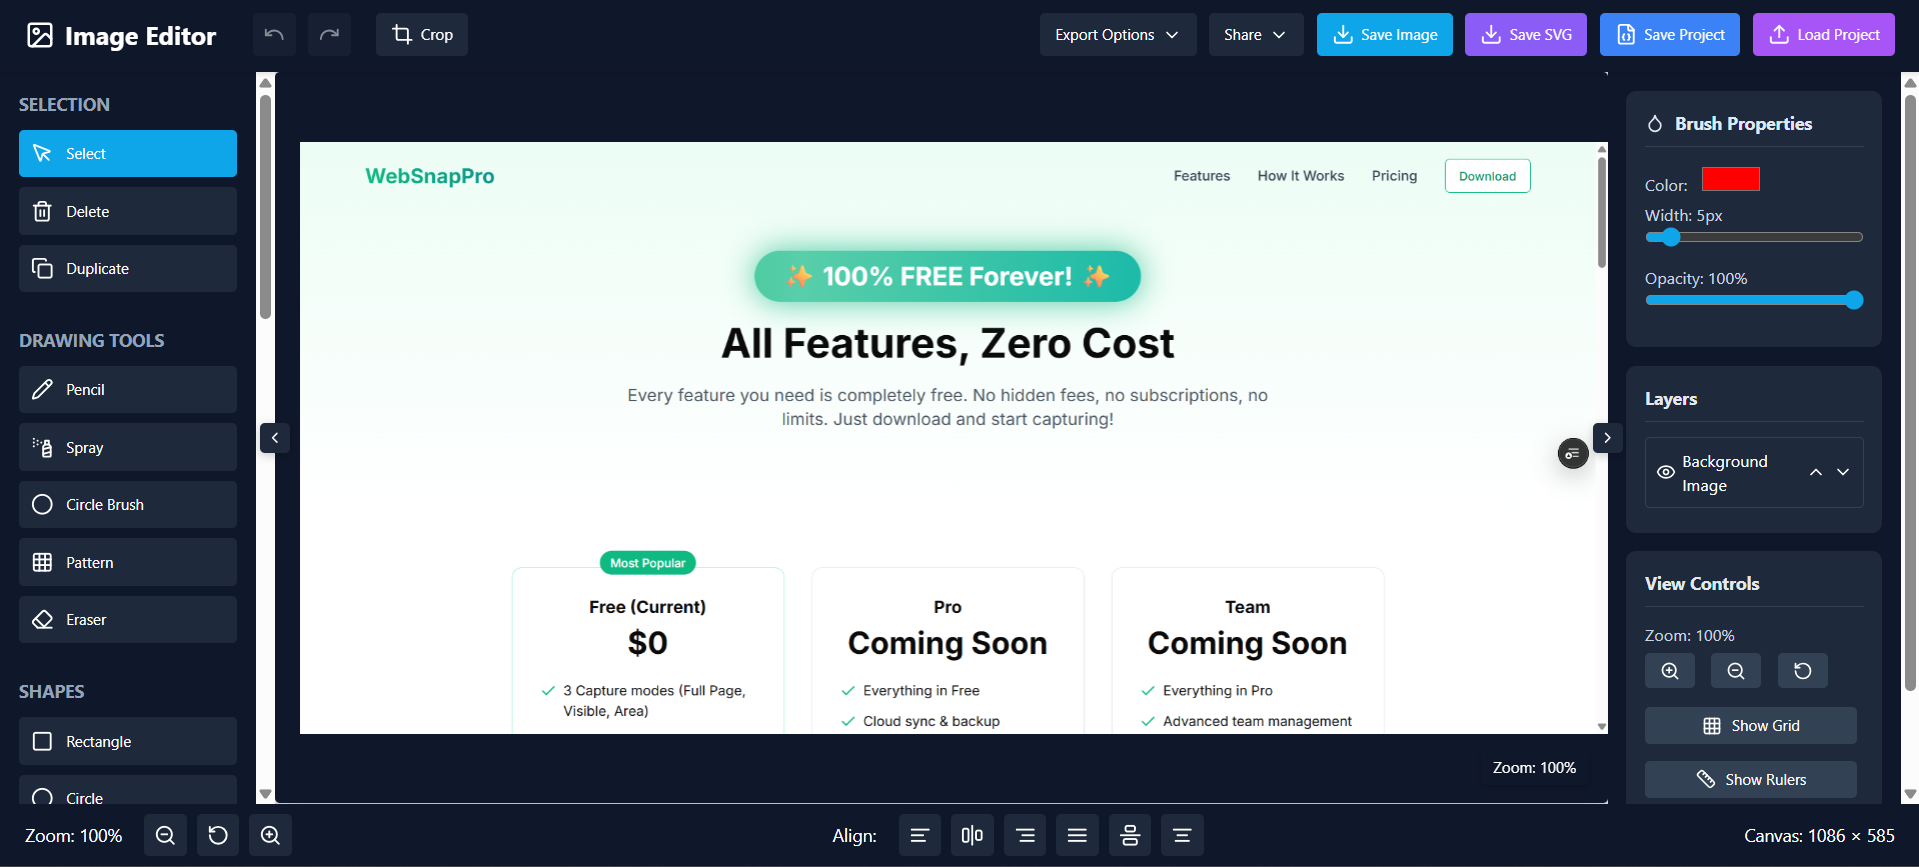
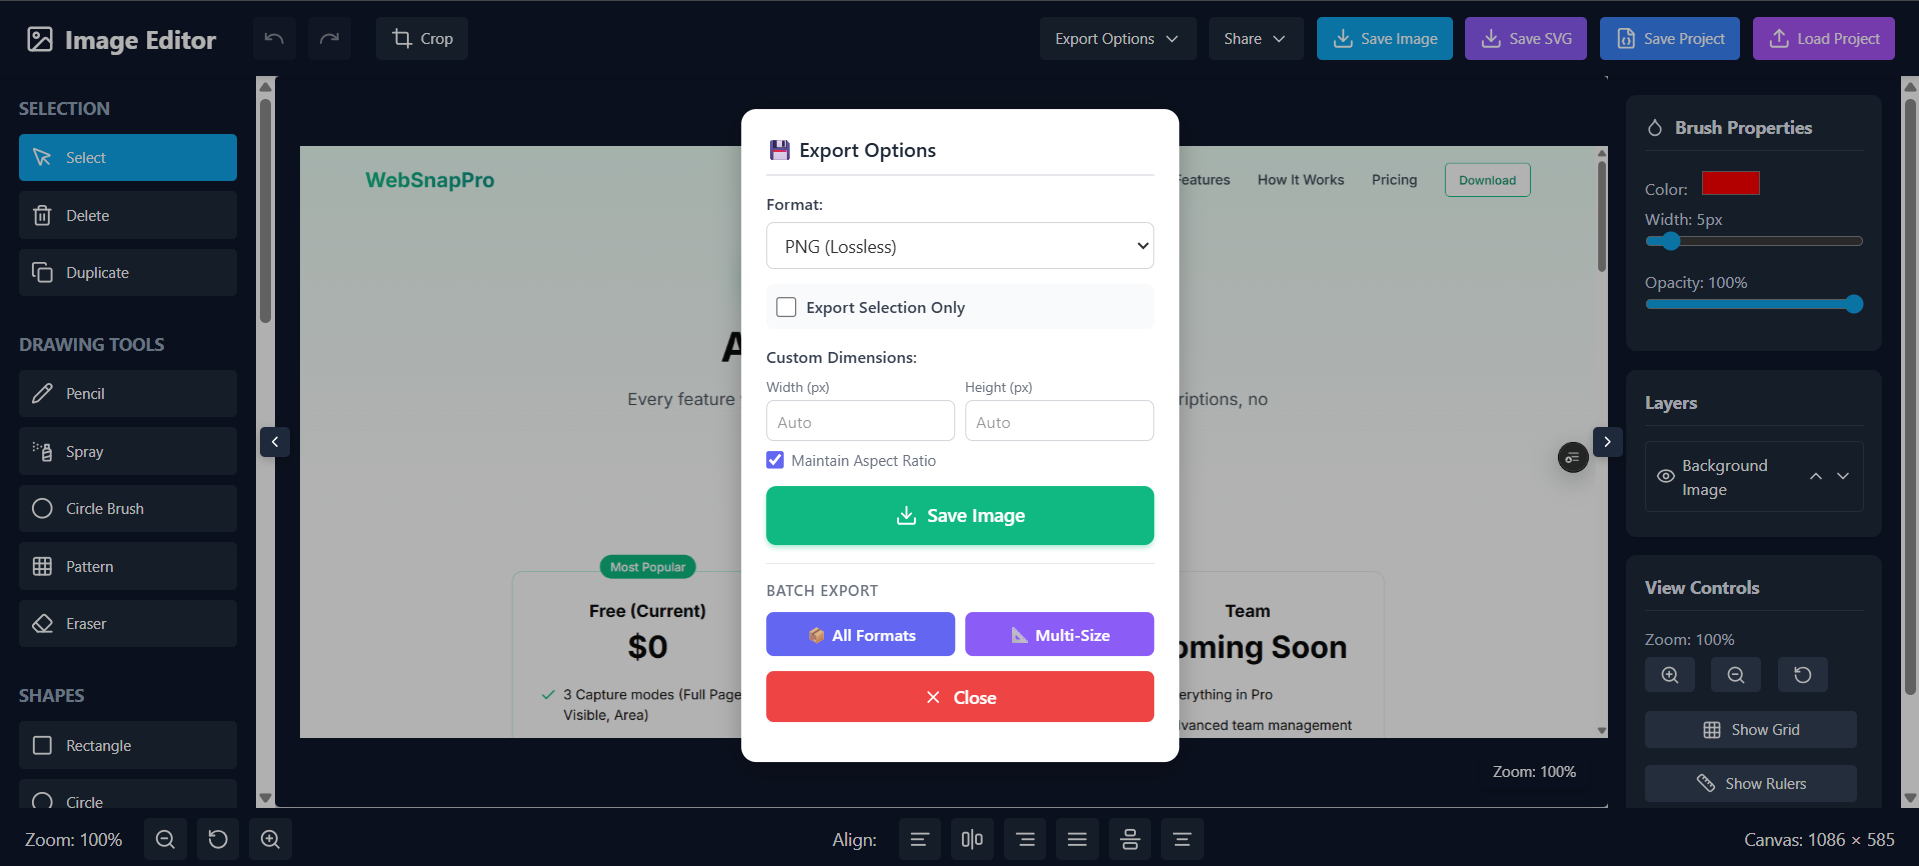
Step 3
Edit with Powerful Tools
Use 15+ tools: Drawing (Pencil-P, Line-L, Arrow-A), Shapes (Rectangle-R, Ellipse-E), Text-T with formatting, Crop-C, Blur-B, Pixelate, Filters, and image adjustments. Undo (Ctrl+Z) and Redo (Ctrl+Y) supported.
Frequently Asked Questions
Have questions about how WebSnapPro works? Find answers to common questions below.